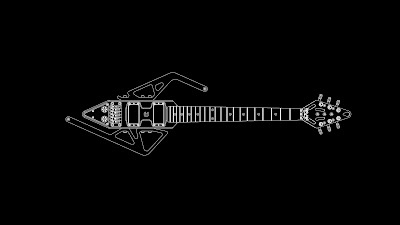
I had to redesign the side plates of the guitar... I was looking over the CAD again and realized the center of gravity was over the fret board. This is very different from a normal guitar because the body is usually heavier than the neck. I modified the top plate to reach out far enough to ensure the center of gravity is between the two strap positions. I know its still not centered between the strap connections, so it will still want to rotate down, but I should be able to play it with the current design. After playing the guitar for the past few months I noticed the best way to play it because of its "unique" center of gravity placement was to place the point at the bottom of the guitar under one leg. That's why the top doesn't have a leg thing sticking out.
Machining the side plates was fairly straight forward. I didn't quite have the right clamps, so I used washers, which worked great. Some needed support on their opposite sides, so I stacked a few screwdriver bits to be 1/2" tall. The parts came out perfectly and the clamps didn't slip.
Putting the holes in the edges of side plates was a little more difficult. I had to align them in the vises. The hole positions aren't very accurate relative to the part, but they're perfect relative to each other. The only tolerance that really mattered was the spacing on the holes, not their absolute locations.
I still haven't done the pickup cover plate, so I still need to use blue tape to hold it in. I finally switched to the chrome plated Gibson pickups. They sound better than the used beaten-up one I was temporarily using. I also need to polish the side plates, but that's fairly time consuming, so I'll put that off for a while.
I also finished the body, so the guitar now has a legitimate jack. Its nice not having to zip-tie and solder the cable to the pickup now. The volume potentiometers are mounted, but I haven't wired them in yet. I still need to machine their shafts down for the knobs to fit properly.
The guitar is getting close to matching up with its render. I added a wooden thing to the render so it wasn't laying in a strange orientation. I will not be making that part.
As for the lamp, I got to try out my new indexable end mill. The original block was 20 lbs of aluminum. I think it was 6061, but I'm not really sure because I bought it from a metal recycling place. It was less than 1/4 the price of a new piece, so I figured it was worth the risk on a part that's essentially an aesthetically pleasing paper weight. I brought the part down to around 12 pounds. If I had a coolant system to clear the chips I'm sure I could have cut alot faster. My cuts were 1/4" deep and 1" wide. The machine was pretty much silent while slotting. I was really impressed with the endmill's quality.
For size reference the base is 8" in diameter and the endmill is 1" in diameter. I was glad I thought ahead and assumed the endmill's edges weren't perfectly square. It left ridges as I cut deeper, so I was forced to surface the outside with a 6 flute HSS endmill. I've heard its a common problem with these types of endmills, but It's also possible it was my fault for buying the inserts from a different supplier than where I purchased the holder. I think I understand the carbide insert codes that determine their dimensions and tolerances. I may buy the more expensive aluminum specific inserts if I have another large amount of material to remove.
The hardest part about machining this was cleaning up the chips. 8 lbs of chips thrown all over the mill and floor is painful to clean up. That's the biggest reason I've put off machining the top side. I'm probably going to finish the guitar before the lamp because it is a lot closer to completion, but I might do the lamp first. It all depends on what machines are available for use.


No comments:
Post a Comment