Now that it's the summer, I finally had the time to finish the desk lamp. The combat robot destroyed any amount of free time I had. I had been using the lamp without the base for over a semester, while the half finished base just sat on my dorm room floor.
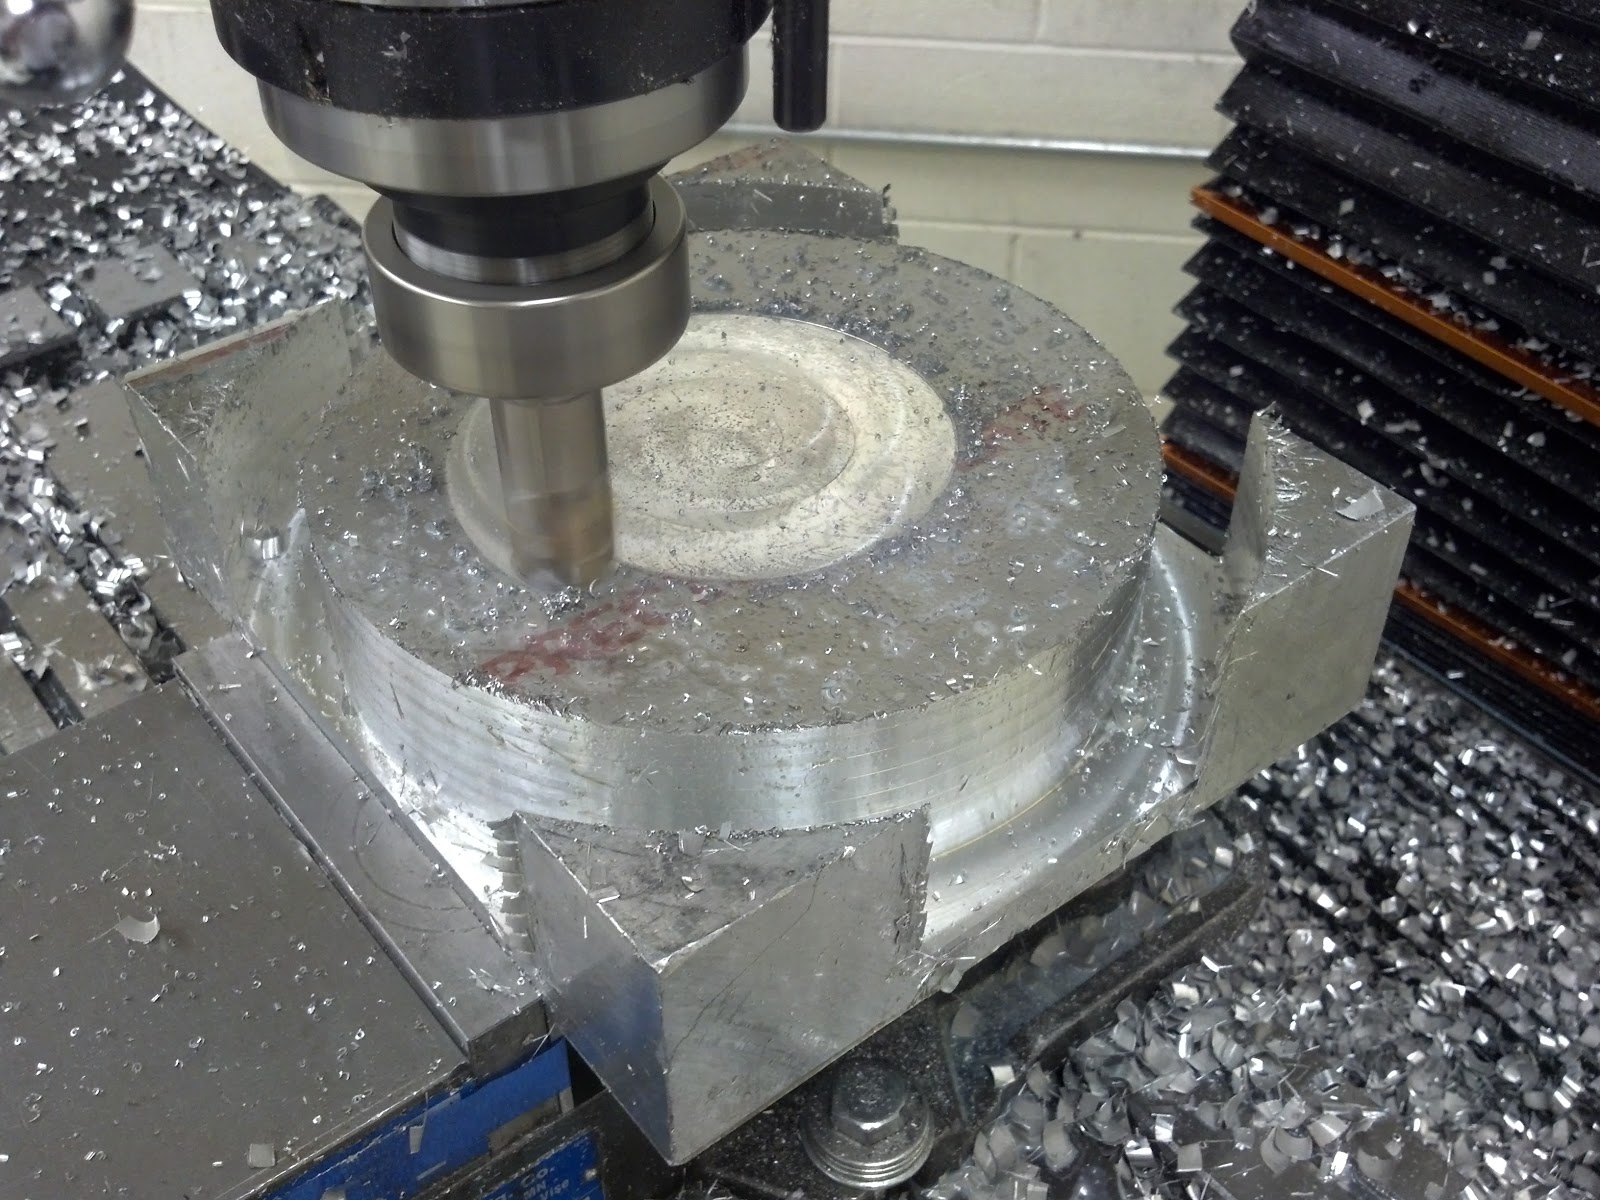
It took a creative setup to machine the other side. I used a 4 jaw chuck from a lathe and clamped it to the mill table. I also added a bolt in the center to hold the part flat to the chuck. The part seems to be flat within .002" which is pretty good because it doesn't matter at all for a desk lamp.
I put some cutting fluid on the part and I used compressed air to keep the chips from clogging up the end mill.
The final base looks perfect!
I snapped a couple photos of the lamp against a whiteboard. It makes a really good background for taking pictures.
I even set it up on my messy desk in my summer apartment.
It definitely goes well with my guitar. I'll need to work on making a desk and other furniture to go with the rest of the things I've been machining lately.
PROS
-The LED is crazy bright. It lights up not just my desk, but also a good fraction of my room.
-MEGA REACH! I can get amazing lighting on any part of my desk.
-Aesthetics. I think this lamp looks amazing.
-Low power consumption. Everyone loves going green now...
-Runs colder. Most desk lamps will give you a nasty burn. This one is pretty warm, but I've held my hand on it without any problems.
CONS
-The ball bearings in the base have too little friction. It swings around on its own on a non-level table.
-Not dimmable. Sometimes its too bright. (I don't think my roommate appreciated it when I pulled all-nighters to finish homework.
-It's fragile. Most of my projects are tough to damage... Not this one.
Overall this is a pretty sweet lamp. A number of people have asked if I am going to make more. I'll probably come up with a production version of the lamp, which gets rid of the CONS and reduces the material and machining costs. There are a few LED desk lamps on the market, but they all suck in my opinion. For now I'll keep using this as my main desk lamp and see how long it lasts (forever hopefully).
Showing posts with label Desk Lamp. Show all posts
Sunday, June 30, 2013
Monday, October 22, 2012
Guitar and Desk Lamp Updates
I haven't concentrated on either the guitar or desk lamp. I really only get time to work on Friday nights after dinner until the school shop closes. The other days are reserved for homework or club activities (New combat robot club at school). The guitar only has the pickup cover plate and the potentiometer knobs left. The only new parts for the lamp are half of the base and the electronics.
Machining the side plates was fairly straight forward. I didn't quite have the right clamps, so I used washers, which worked great. Some needed support on their opposite sides, so I stacked a few screwdriver bits to be 1/2" tall. The parts came out perfectly and the clamps didn't slip.
Putting the holes in the edges of side plates was a little more difficult. I had to align them in the vises. The hole positions aren't very accurate relative to the part, but they're perfect relative to each other. The only tolerance that really mattered was the spacing on the holes, not their absolute locations.
I still haven't done the pickup cover plate, so I still need to use blue tape to hold it in. I finally switched to the chrome plated Gibson pickups. They sound better than the used beaten-up one I was temporarily using. I also need to polish the side plates, but that's fairly time consuming, so I'll put that off for a while.
I also finished the body, so the guitar now has a legitimate jack. Its nice not having to zip-tie and solder the cable to the pickup now. The volume potentiometers are mounted, but I haven't wired them in yet. I still need to machine their shafts down for the knobs to fit properly.
For size reference the base is 8" in diameter and the endmill is 1" in diameter. I was glad I thought ahead and assumed the endmill's edges weren't perfectly square. It left ridges as I cut deeper, so I was forced to surface the outside with a 6 flute HSS endmill. I've heard its a common problem with these types of endmills, but It's also possible it was my fault for buying the inserts from a different supplier than where I purchased the holder. I think I understand the carbide insert codes that determine their dimensions and tolerances. I may buy the more expensive aluminum specific inserts if I have another large amount of material to remove.
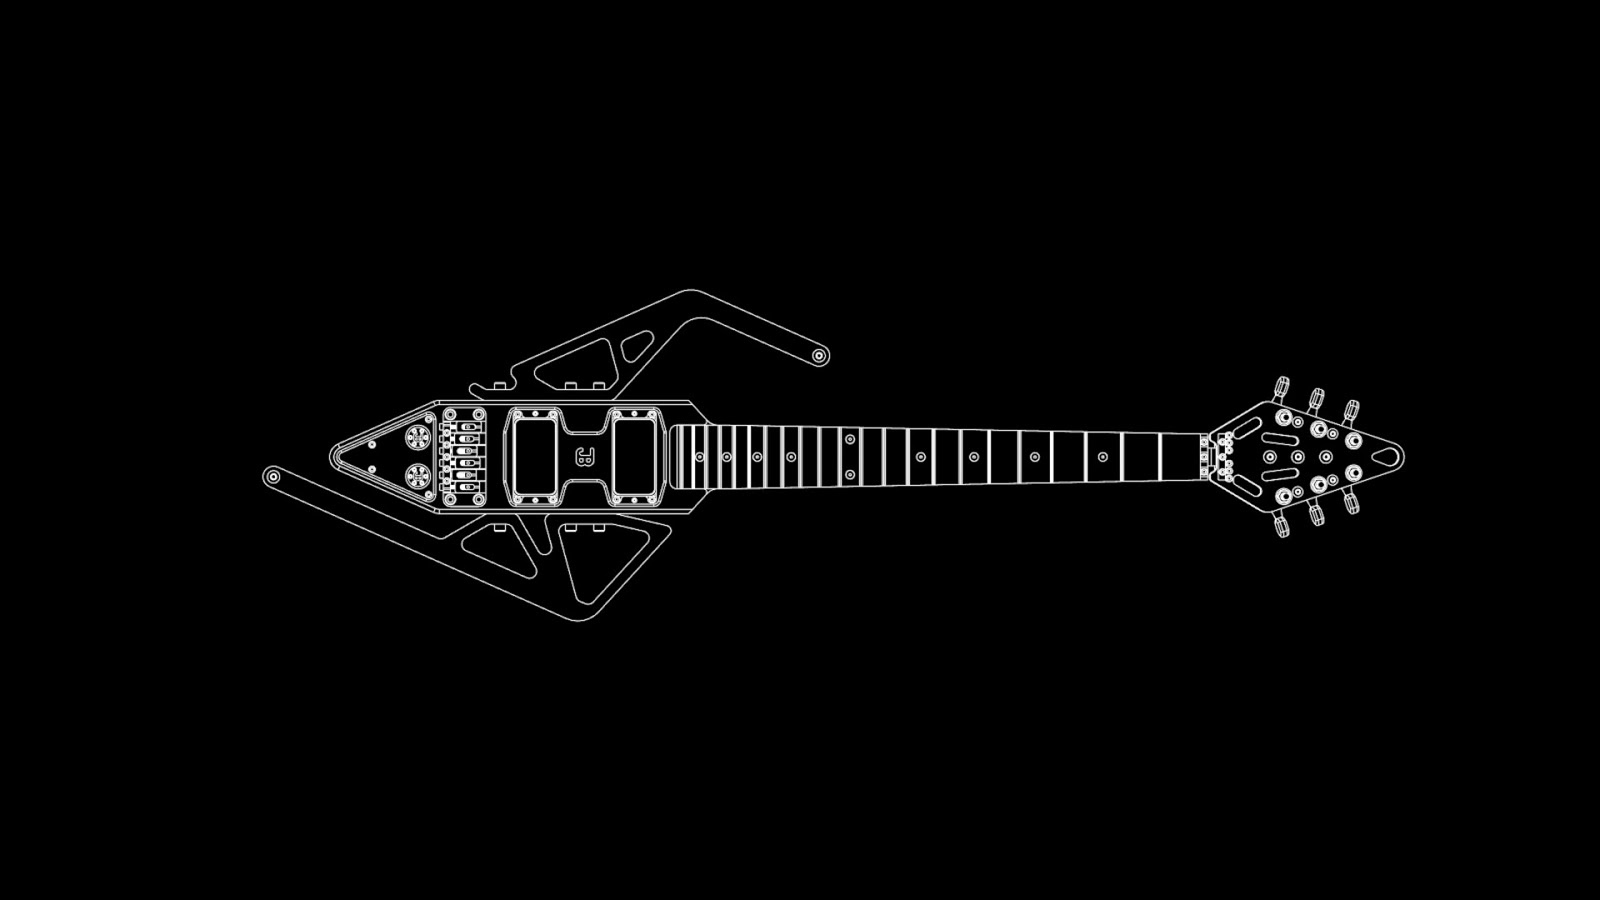
I had to redesign the side plates of the guitar... I was looking over the CAD again and realized the center of gravity was over the fret board. This is very different from a normal guitar because the body is usually heavier than the neck. I modified the top plate to reach out far enough to ensure the center of gravity is between the two strap positions. I know its still not centered between the strap connections, so it will still want to rotate down, but I should be able to play it with the current design. After playing the guitar for the past few months I noticed the best way to play it because of its "unique" center of gravity placement was to place the point at the bottom of the guitar under one leg. That's why the top doesn't have a leg thing sticking out.
Machining the side plates was fairly straight forward. I didn't quite have the right clamps, so I used washers, which worked great. Some needed support on their opposite sides, so I stacked a few screwdriver bits to be 1/2" tall. The parts came out perfectly and the clamps didn't slip.
Putting the holes in the edges of side plates was a little more difficult. I had to align them in the vises. The hole positions aren't very accurate relative to the part, but they're perfect relative to each other. The only tolerance that really mattered was the spacing on the holes, not their absolute locations.
I still haven't done the pickup cover plate, so I still need to use blue tape to hold it in. I finally switched to the chrome plated Gibson pickups. They sound better than the used beaten-up one I was temporarily using. I also need to polish the side plates, but that's fairly time consuming, so I'll put that off for a while.
I also finished the body, so the guitar now has a legitimate jack. Its nice not having to zip-tie and solder the cable to the pickup now. The volume potentiometers are mounted, but I haven't wired them in yet. I still need to machine their shafts down for the knobs to fit properly.
The guitar is getting close to matching up with its render. I added a wooden thing to the render so it wasn't laying in a strange orientation. I will not be making that part.
As for the lamp, I got to try out my new indexable end mill. The original block was 20 lbs of aluminum. I think it was 6061, but I'm not really sure because I bought it from a metal recycling place. It was less than 1/4 the price of a new piece, so I figured it was worth the risk on a part that's essentially an aesthetically pleasing paper weight. I brought the part down to around 12 pounds. If I had a coolant system to clear the chips I'm sure I could have cut alot faster. My cuts were 1/4" deep and 1" wide. The machine was pretty much silent while slotting. I was really impressed with the endmill's quality.
For size reference the base is 8" in diameter and the endmill is 1" in diameter. I was glad I thought ahead and assumed the endmill's edges weren't perfectly square. It left ridges as I cut deeper, so I was forced to surface the outside with a 6 flute HSS endmill. I've heard its a common problem with these types of endmills, but It's also possible it was my fault for buying the inserts from a different supplier than where I purchased the holder. I think I understand the carbide insert codes that determine their dimensions and tolerances. I may buy the more expensive aluminum specific inserts if I have another large amount of material to remove.
The hardest part about machining this was cleaning up the chips. 8 lbs of chips thrown all over the mill and floor is painful to clean up. That's the biggest reason I've put off machining the top side. I'm probably going to finish the guitar before the lamp because it is a lot closer to completion, but I might do the lamp first. It all depends on what machines are available for use.
Friday, August 31, 2012
Desk Lamp - New Project
During my last semester at school I discovered the need for a desk lamp. The one I used during the semester was chunky and didn't quite have the reach I needed to light the center of my desk (I put the lamp's base on one of my speakers). I also burned myself a few times on the light housing. As usual I figured I could do better.
These were a few of my design thoughts:
-High power LED (More light, less heat, nearly unlimited lifetime, less power consumption, smaller, lighter)
-LARGE (My computer setup is around 80" wide)
-Light weight (The lighter the arm is, the smaller the base can be without the lamp tipping)
-Cool looking (who wants an eye sore on their desk?)
I actually came up with this a few months ago, but I hadn't decided to make it until the past couple days.
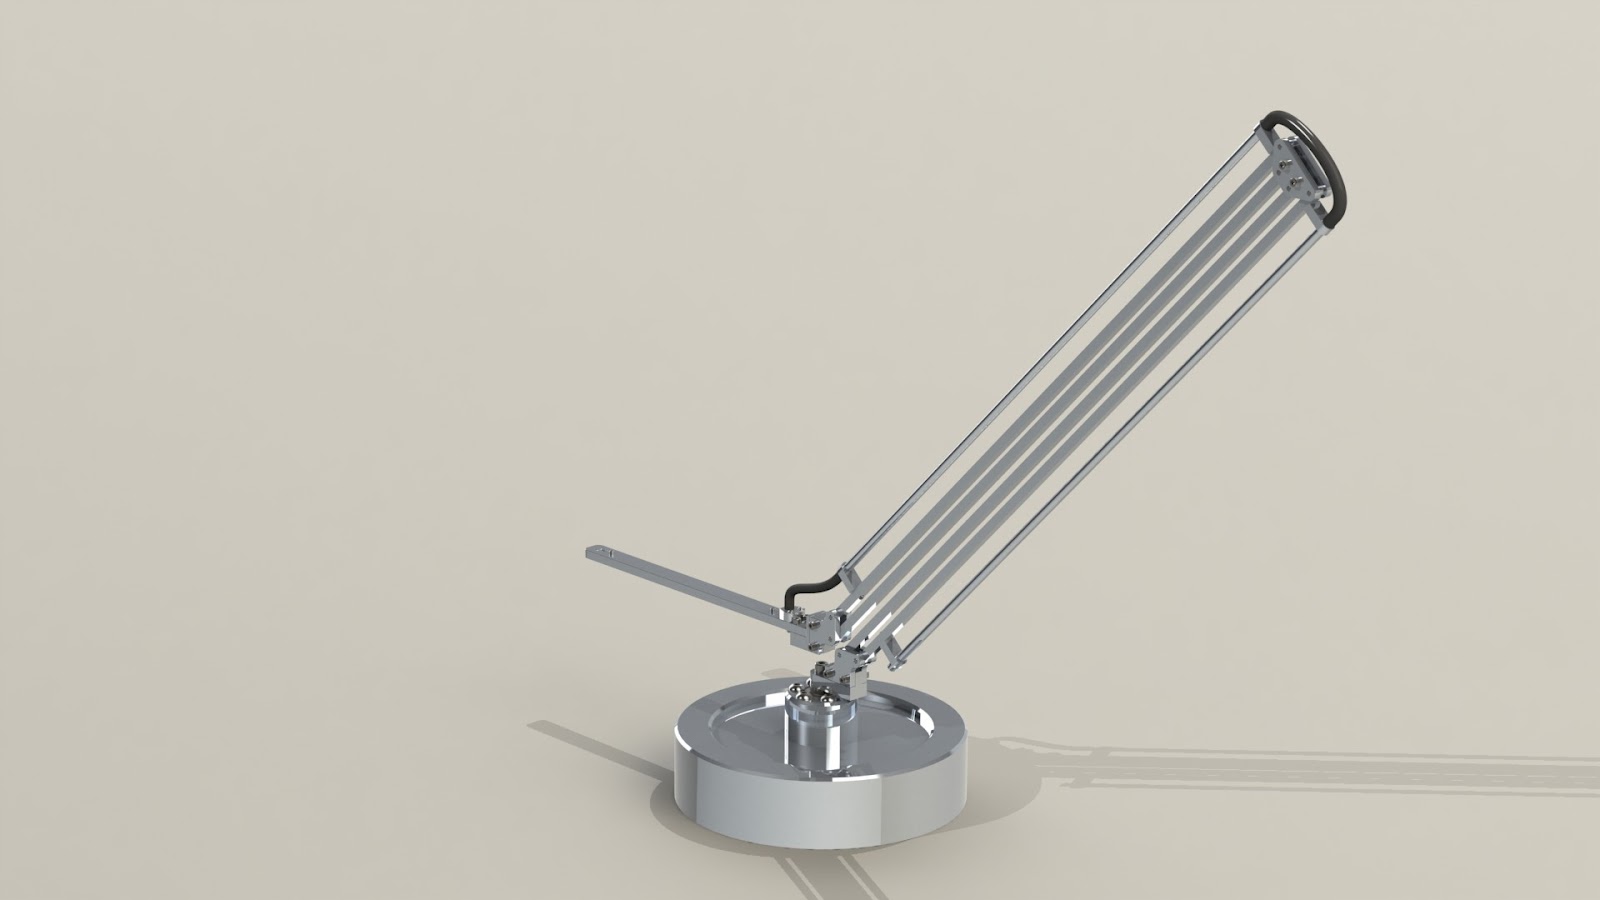
Here's a few quick renders of the lamp in a few positions.
This design has a swivel base to give the lamp more flexibility. The light is held by two parallel arm segments. No matter where the light is positioned it will always be parallel to the base of the lamp. I found a really cool led strip that is a 10 watt LED, so it should easily light up the desk and maybe even the room. I made sure the base was large enough that the lamp would never tip, even when fully extended. The base is an 8" diameter piece of aluminum. The current base will weigh over 9 pounds while the entire arm and light should only weigh a little over a pound.
I started with the arm because the pieces were small and required little material removal. The long pieces used for the parallel arm gave me an excuse to use my 40" calipers (I had been itching to use them to make an actual part).
These parts could have been made a lot faster if I had a machine that could accept bits larger than 1/8"...
I am fortunate that my CNC mill is very accurate and always seems to hit its dimensions without any need for cutting and measuring, but it's sooooo slow.
All of the arm pieces are made from 1/4" square aluminum. Each one has 1/8" press fit stainless dowel pins.
Each segment of the arm has 1/4" aluminum tubing to keep the wires hidden and protected. The tubing is .035" wall, so it doesn't add much weight at all.
The arm has nearly zero play in the joints. Even the slightest touch to one end will cause the other to move as well. The two end pieces are always perpendicular to each other. It's also symmetrical which makes it harder for me to assemble it incorrectly =D
The arm is held in place by the clamping force from the center joint's plates. This picture also shows the size of the lamp.
So far the lamp seems really solid even though it's made from such tiny aluminum rods. It should be a nice addition to my desk once I finish the base and LED housing.
These were a few of my design thoughts:
-High power LED (More light, less heat, nearly unlimited lifetime, less power consumption, smaller, lighter)
-LARGE (My computer setup is around 80" wide)
-Light weight (The lighter the arm is, the smaller the base can be without the lamp tipping)
-Cool looking (who wants an eye sore on their desk?)
I actually came up with this a few months ago, but I hadn't decided to make it until the past couple days.
Here's a few quick renders of the lamp in a few positions.
This design has a swivel base to give the lamp more flexibility. The light is held by two parallel arm segments. No matter where the light is positioned it will always be parallel to the base of the lamp. I found a really cool led strip that is a 10 watt LED, so it should easily light up the desk and maybe even the room. I made sure the base was large enough that the lamp would never tip, even when fully extended. The base is an 8" diameter piece of aluminum. The current base will weigh over 9 pounds while the entire arm and light should only weigh a little over a pound.
I started with the arm because the pieces were small and required little material removal. The long pieces used for the parallel arm gave me an excuse to use my 40" calipers (I had been itching to use them to make an actual part).
I am fortunate that my CNC mill is very accurate and always seems to hit its dimensions without any need for cutting and measuring, but it's sooooo slow.
All of the arm pieces are made from 1/4" square aluminum. Each one has 1/8" press fit stainless dowel pins.
Each segment of the arm has 1/4" aluminum tubing to keep the wires hidden and protected. The tubing is .035" wall, so it doesn't add much weight at all.
The arm has nearly zero play in the joints. Even the slightest touch to one end will cause the other to move as well. The two end pieces are always perpendicular to each other. It's also symmetrical which makes it harder for me to assemble it incorrectly =D
The arm is held in place by the clamping force from the center joint's plates. This picture also shows the size of the lamp.
So far the lamp seems really solid even though it's made from such tiny aluminum rods. It should be a nice addition to my desk once I finish the base and LED housing.
Subscribe to:
Posts (Atom)