Showing posts with label SolidWorks. Show all posts

Monday, April 27, 2015

Guitar Upgrade Parts

It has been a few years since I built my guitar. I've come to be very annoyed with the shape and weight balance of the body. This comes down to two complaints. First I can't sit with the guitar on one leg like any regular guitar, which makes playing it in a relaxing position a very difficult task. Second I can't play with the guitar while standing up and hanging from a strap. The heavy neck and head had shifted the center of gravity fairly far forward. The guitar tended to tip forward even with the extended front strap mount.

After thinking about the problem for some time I figured I needed to look at the center of gravity in relation to the two mounting points for the strap. Looking at it now, the CG is obviously going to pull harder on one end of the strap than the other end when hanging in a comfortable playing position. I concluded I needed to make the CG as close to centered between the two strap mounts as possible. I figured friction between the strap and the players neck could tolerate some unbalanced CG.

I designed a new set of side plates for the guitar. These plates differ from the originals in a few ways. First, they're wider than the original plates. This reduces the contact pressure on your leg when playing. Second, they have a concave shape. This allows me to stably rest the guitar on when leg. The concave shape makes it significantly more comfortable to play for extended periods of time. Third, the new plates have more mass in the back. This shifts the CG further back and helps to mitigate the tipping seen in the old design. Finally, The strap mounting points were shifted to be more centered on the CG. I didn't make it perfectly centered, but the strap should hold some imbalance in the weight by friction on my neck.

I think the new plate design just looks a lot better than the old ones. I had more input from friends on what looks good / bad as well as ways to fix what doesn't look good.

The upgrade parts really did the trick - I can comfortably play the guitar while sitting or standing. There is still a small amount of weight imbalance when playing while standing, but it doesn't prevent me from using the guitar. The old design was mostly impossible to play when standing up. The bigger side plates did add some more mass to the guitar. The old design was about 10.1 pounds, while the new design is around 12.6 pounds. I think I need to make a new guitar from scratch if I want to drop the weight and get the right weight balance. I think the neck and especially the head really mess up the center of gravity because they are the furthest portions from the body. An easy improvement would be changing the fretboard material to something less dense than stainless steel (titanium or aluminum). Overall I'm pretty happy with the guitar in its current state, and I probably won't get or build a new one for quite a while.

Saturday, November 1, 2014

Quick Project - Evil IronMan

I got invited to a Halloween party about two hours before the party started. The party had a mandatory costume policy. Being an engineer and a new owner of a 3D printer I figured I HAD to 3D print my costume. The first thing that came to mind when thinking of 3D printing and Halloween costumes was an arc reactor. I've seen a bunch made on the internet and even a few for various Halloweens in the past. I remember that I had a box of LEDs. Unfortunately, I discovered that I only had two blue LEDs. Luckily I also had eight red LEDs... so the obvious costume became evil IronMan. I spent about 30 minutes drawing up the part in SolidWorks and then sent it to the printer. The print time was a little under two hours (it's cool to be slightly late to parties). While the part was printing I had to make the wiring.


I pushed each of the LEDs through a 1:1 drawing of the frame. I soldered all of the LEDs together with some solid wire to give some structure to the electronics. I also used two bent spiral wires for the + and - connections to the battery. I tore away the paper to release the electronics for the final assembly. I didn't use any current limiting resistors or a proper current driver because the battery voltage was lower than the rated voltage for the LEDs. I also figured that the small coin cell battery wouldn't be able to supply enough current to fry six LEDs in parallel.


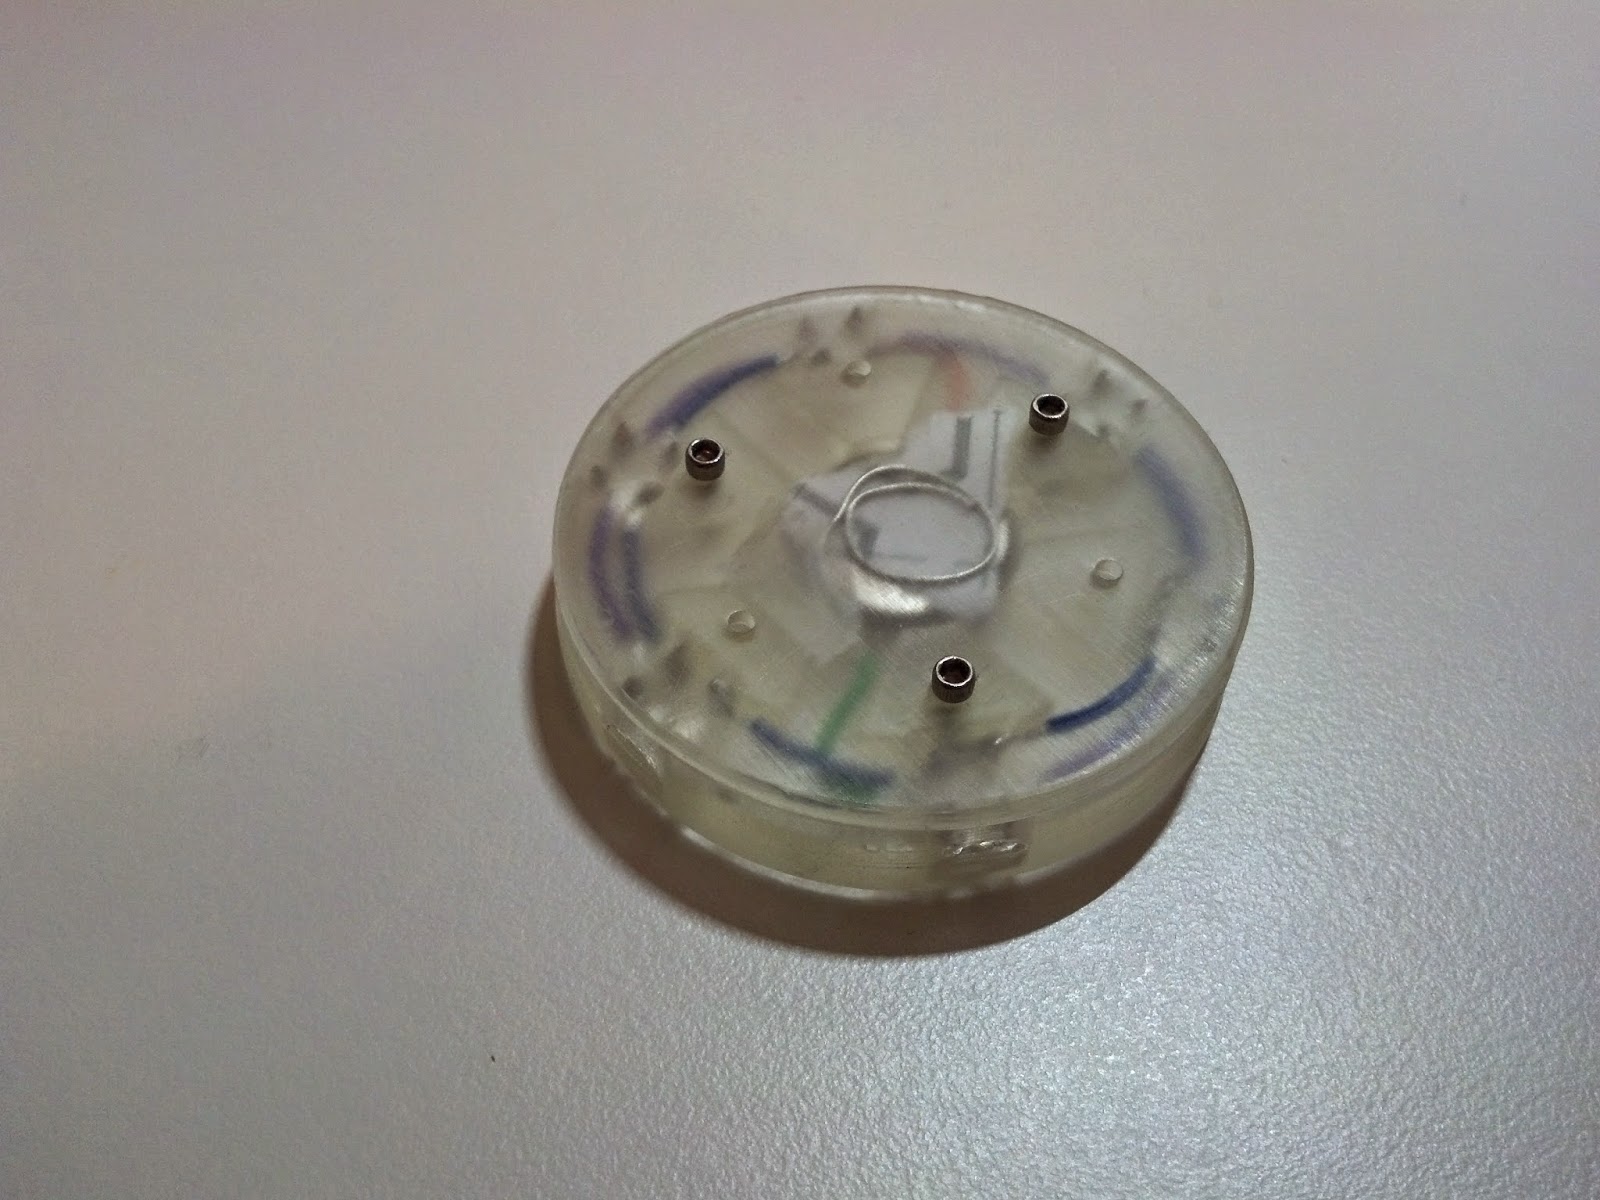
Here's a top side view of the arc reactor. Each of the LEDs stuck out from the frame to ensure maximum brightness. It also saved some material and print time.


This is the back side of the arc reactor. I have paper shoved between the battery and the contact to prevent the LEDs from turning on. I didn't have a switch so the back has to be unscrewed to connect and disconnect the battery.


This is the arc reactor shining through my shirt. The camera doesn't do a very good job showing how bright the LEDs looked shining through my shirt. I used lots of tape to hold it in place.

Surprisingly the arc reactor stayed lit up all night. I didn't even have to break out the spare battery and hex key that I kept in my pocket. The design wasn't too great, but im pretty proud of it considering it went from concept to finished product in a little over two hours!

Saturday, December 17, 2011

Black Friday Computer Upgrade

I had an EXCELLENT Black Friday. I didn't want to distract myself for the last few weeks of school, so I shipped my amazing find home instead. In the end my Black Friday deal turned out to be a great "survived" the semester gift. This became one of my few impulse buys. I saw the deal on Newegg and couldn't resist. Who wouldn't want three monitors?

 They work great for CAD. Those wide format assemblies like my long board can be put 1:1 on the screens.

Ok... I'll admit they are somewhat ridiculous, but they finally gave me my "Command Center". I had been running two monitors for a few years before getting these new monitors. I found I have trouble using a computer with fewer than 2 monitors. I usually put whatever program I'm using on my main screen and something I need to use often on the other. When designing stuff I put my CAD on one display and the file browser on the other. I never have to minimize the CAD in order to open new files. With the three monitors I use the center and right monitors as I always have. The new left monitor gets used for "research". Research is usually Google for whatever information I might need for designs or homework.

Now I just need to figure out how to fit the monitors and my rather large speakers on my small desk at school... I'll probably have to hang a bit over onto my roommate's desk. Hopefully there won't be too many complaints =D

Thursday, June 30, 2011

Long Board - New Project

After a year of walking to class I decided I needed a long board to get to class. In my usual style I figured I should make one instead of buying one. I started by doing some research on the designs and standards for long boards and skate boards. I saw a number of different truck designs that seemed common. It seems that the rubber bushing style of truck is the most popular. In this design the truck is forced to straighten itself out by squished pieces of rubber. These pieces give the boarder more resistance as they attempt to steer the board. My personal favorite design used metal springs instead of the rubber bushings. I like to design things to last. I figured the springs would never deteriorate with time. Unfortunately I couldn't figure out how to make the trucks small and use the springs. Eventually I decided to go with the standard design for long board trucks. The one thing that really bugged me about this truck design was there wasn't a defined mechanism that caused the truck to turn. The pins in the trucks relied on a loose fit in order to actually turn. I started to look for an improvement when I stumbled upon spherical bearings on Mcmaster. These bearings gave freedom in all directions, which was the exact motion I needed. I designed the trucks around these bearings.  The spherical bearings give the trucks fully defined motion.

After deciding on the components I immediately started up SolidWorks and started poking around with different designs. Eventually I settled with this design for the trucks.
This render of the entire board has an older design for the trucks. I spent a few days changing around the design to make it easier for me to machine. The best looking board in my opinion was one made from 1/2" polycarbonate. I figure this board will really stand out when around the regular long boards.
I split the truck into many different pieces to avoid material removal. The biggest limiting factor when I'm machining is removing material. Splitting up pieces meant a large portion of the parts were extruded aluminum with holes drilled in them. Parts like that are really easy to produce with a manual machine. The design also meant that I only needed CNC work for the bearing seats and the side plates for the trucks. I attempted to locate the parts by geometry instead of the bolt holes themselves. The most critical surfaces required parallel edges, which are very easy to produce in one setup on either the manual or CNC mill. The only new thing for me on these trucks was the use of spherical bearings. I hope they perform as well as I imagined them performing.

Saturday, January 8, 2011

Powered Desk Chair

This project had a lot of potential, but I kind of let it fail. Maybe I'll finish it one day, but it probably won't be any time in the near future.

I had an Ikea desk chair that didn't roll very well, so I figured I'd modify it into a powered desk chair. It would have "swerve modules" to give it the ability to strafe and turn just like a normal unpowered desk chair. The design was fairly simple stuff that I had basically done in robotics at my high school. The intended final chair would have looked like this, but the electronics required to make it run properly were a bit out of my budget range.

The continuous 40A motor controllers put the electronics out of my budget considering the ones I had used in the past cost around 90 dollars a piece. I made the three swerve modules before I decided to ditch the project.

 As with most of my projects I had to use the arbor press. It took apart that Ikea chair with ease.


Even though I bagged the project I learned a lot from its construction. In order to make the sprockets I wrote a program in python to generate the g-code for my CNC to cut any size sprocket. I also learned what tolerances are needed to make a chain drive without a chain tensioner and I also learned what tolerances work with bevel gears. Did I mention that I also have 3 very cool looking paper weights?

Sunday, August 15, 2010

Phone Case - New Project

My phone was a little bit too bland for me, so I decided it needed a cool case. I couldn't find one that I liked for it, so making one in the shop was the next best option. A few years ago I had designed a case for my IPod, but I never got around to machining it because it required me to write too much code for my CNC.
It was made from 2 pieces. The front plate was simple and could all be machined in one setup, but the back piece need to have the center machined out. Aside from the time required to write out the tool paths by hand, the machine time on my CNC would have been too unbearable for me to make the case. This did however serve as the basis for my phone case concept.

I started off designing the phone case by getting the dimensions for my phone. Thankfully it wasn't one of those "ergonomically" shaped phones, so the phone was basically a rectangle with rounded corners. After taking down the dimensions I opened up SolidWorks and started playing around with different concepts. Eventually I came to this design.
The general concept was a ring that surrounded the phone and a plate on the top and bottom that held the phone in place. The ring only requried a slot to be machined around the inside perimeter. This would leave a nice little plug of material in the center that could be used for another project. This case needed #0-80 screws. Since the sides were so thick the case needed button extenders to allow me to actually use the phone. For some reason my first thought was to machine small holes in the side of the case for the buttons to slip into.  This design quickly turned my simple ring idea into a nasty 4 sided machining job. I don't have an edge finder for my CNC, so I was not in the mood to re-zero it multiple times on a single part. With ease of machining in mind I redesigned the case again.
(This render came after making the case. I got lazy and used polycarbonate instead of an aluminum ring as I had originally Intended)

This new design gave me the option to do all of the parts with single sided machining and minimal material removal. Both are things I strongly prefer when producing any part. Hopefully the case will be a quick one day project.